Showing posts with label curb appeal. Show all posts

Wednesday, November 13, 2013

Curb Appeal - Before and After

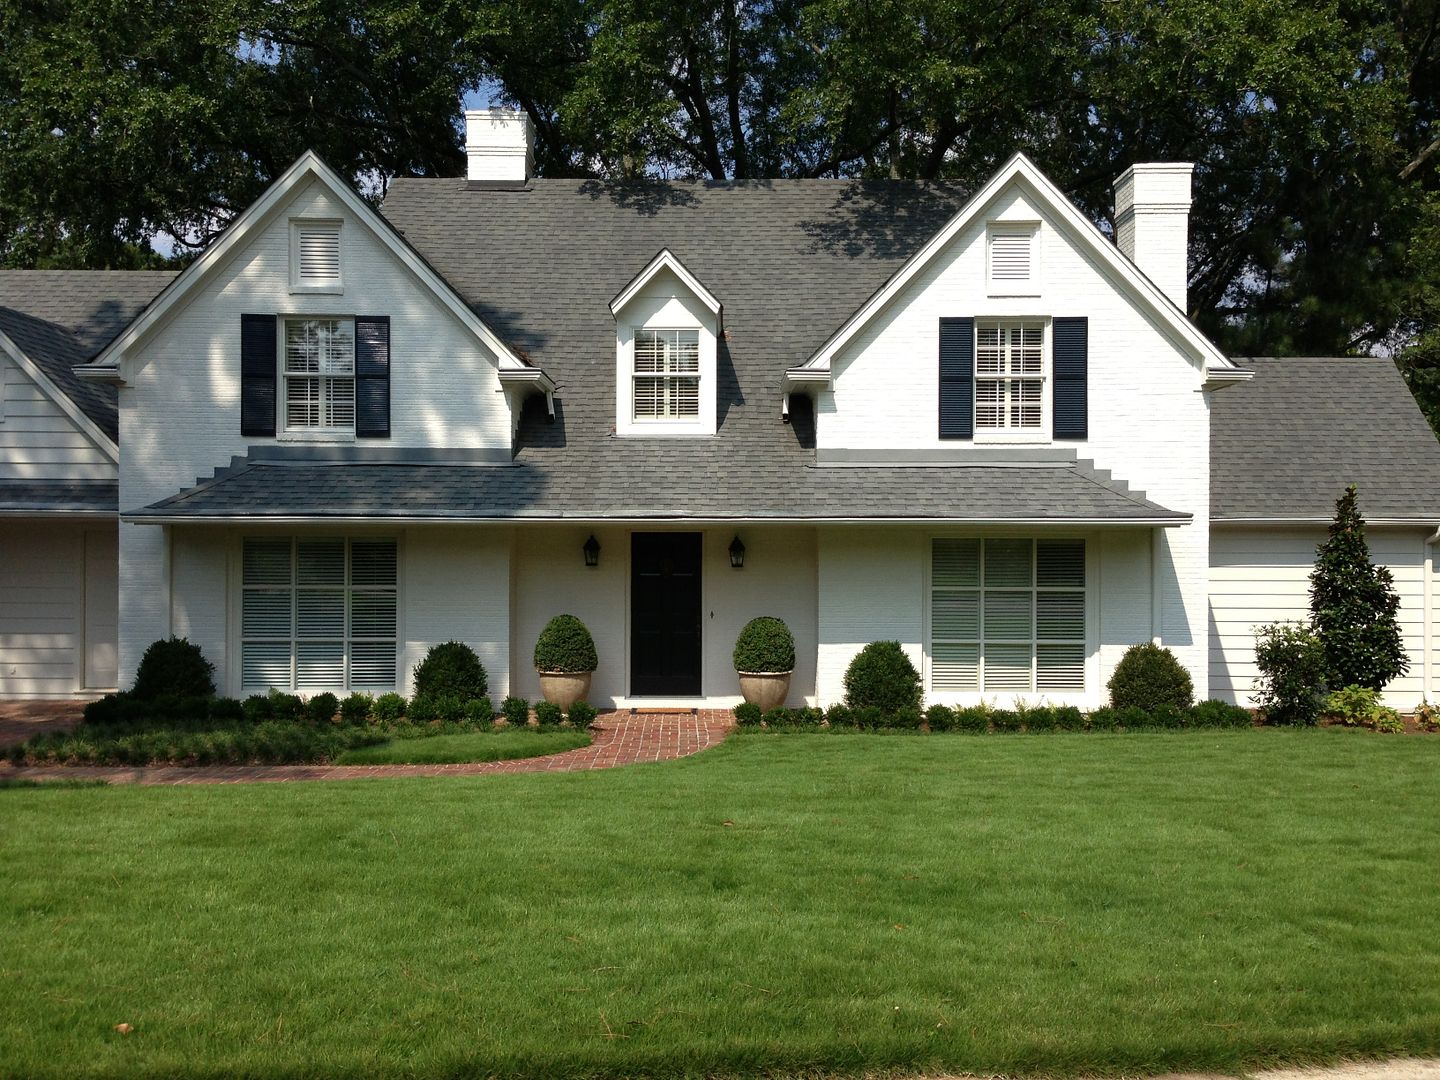
Back in the summer, I had a client contact me who was getting ready to paint the exterior of her house.  She saw the post I did on another exterior paint project (click here for those details) and wanted my thoughts for her house.  It's been several months and my client has been busy implementing the plan.  She has also been so sweet to continue to send me pictures of the progress.  I thought it was time to share them with you.   

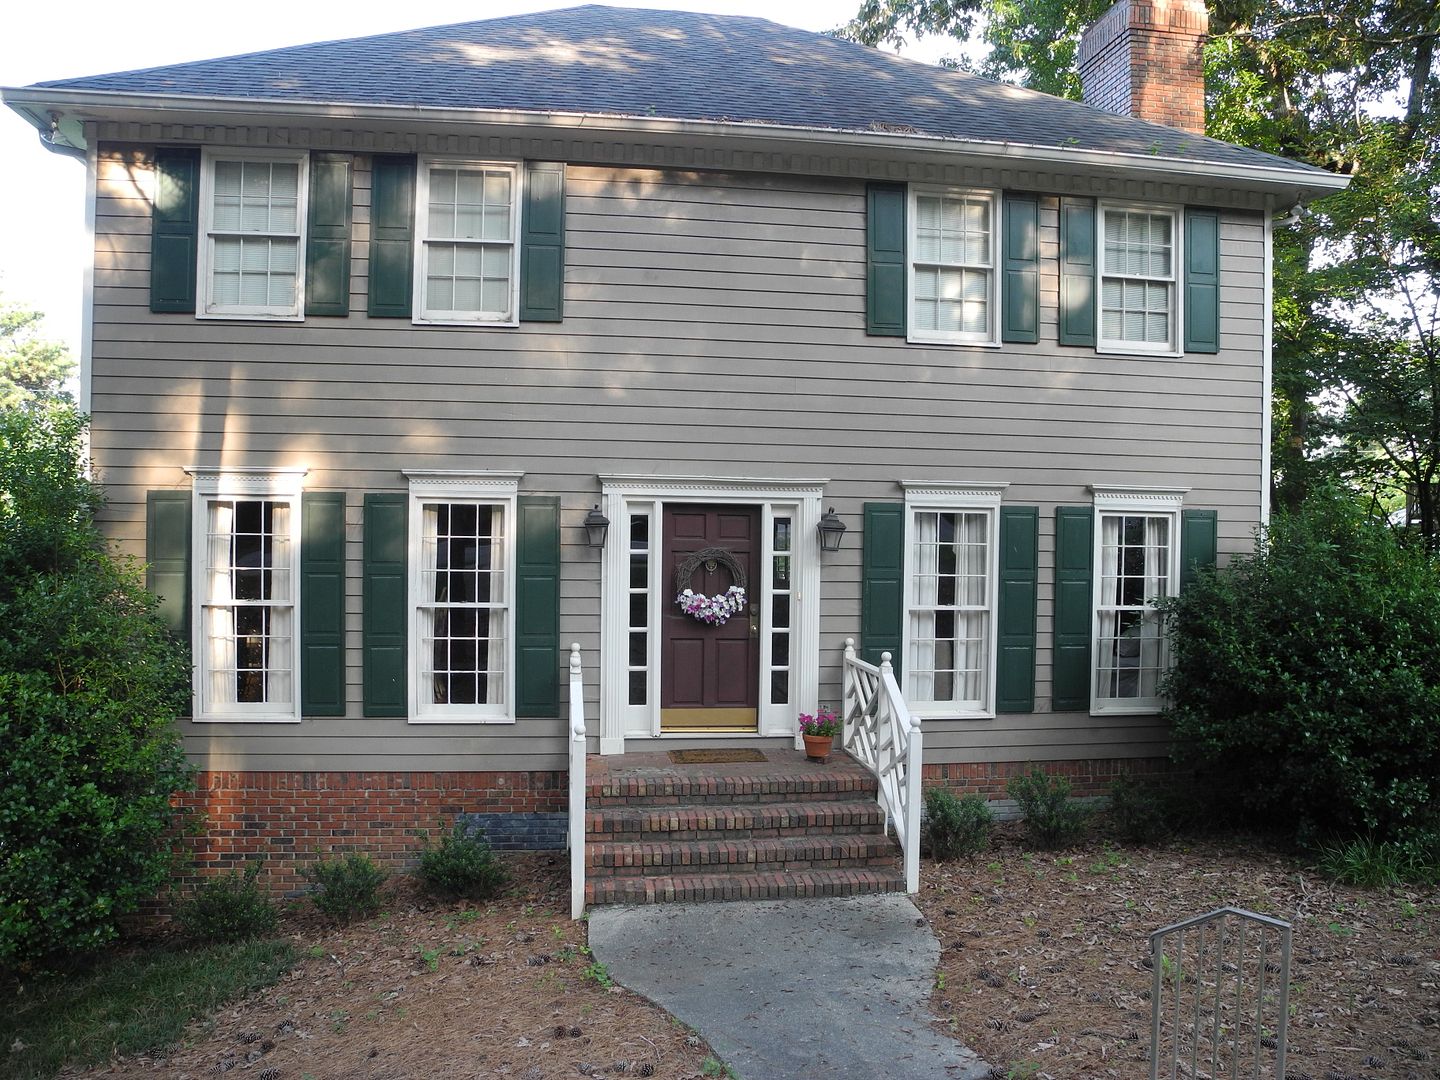
My clients have a lovely saltbox which is a Colonial style of architecture originating in New England.  In all honestly, they were not unhappy with the look of the home - just curious of how it could look if painted differently.  So, I came up with a new paint schedule and recommended a few edits and additions.  

Here's where we started. . .  the before.   


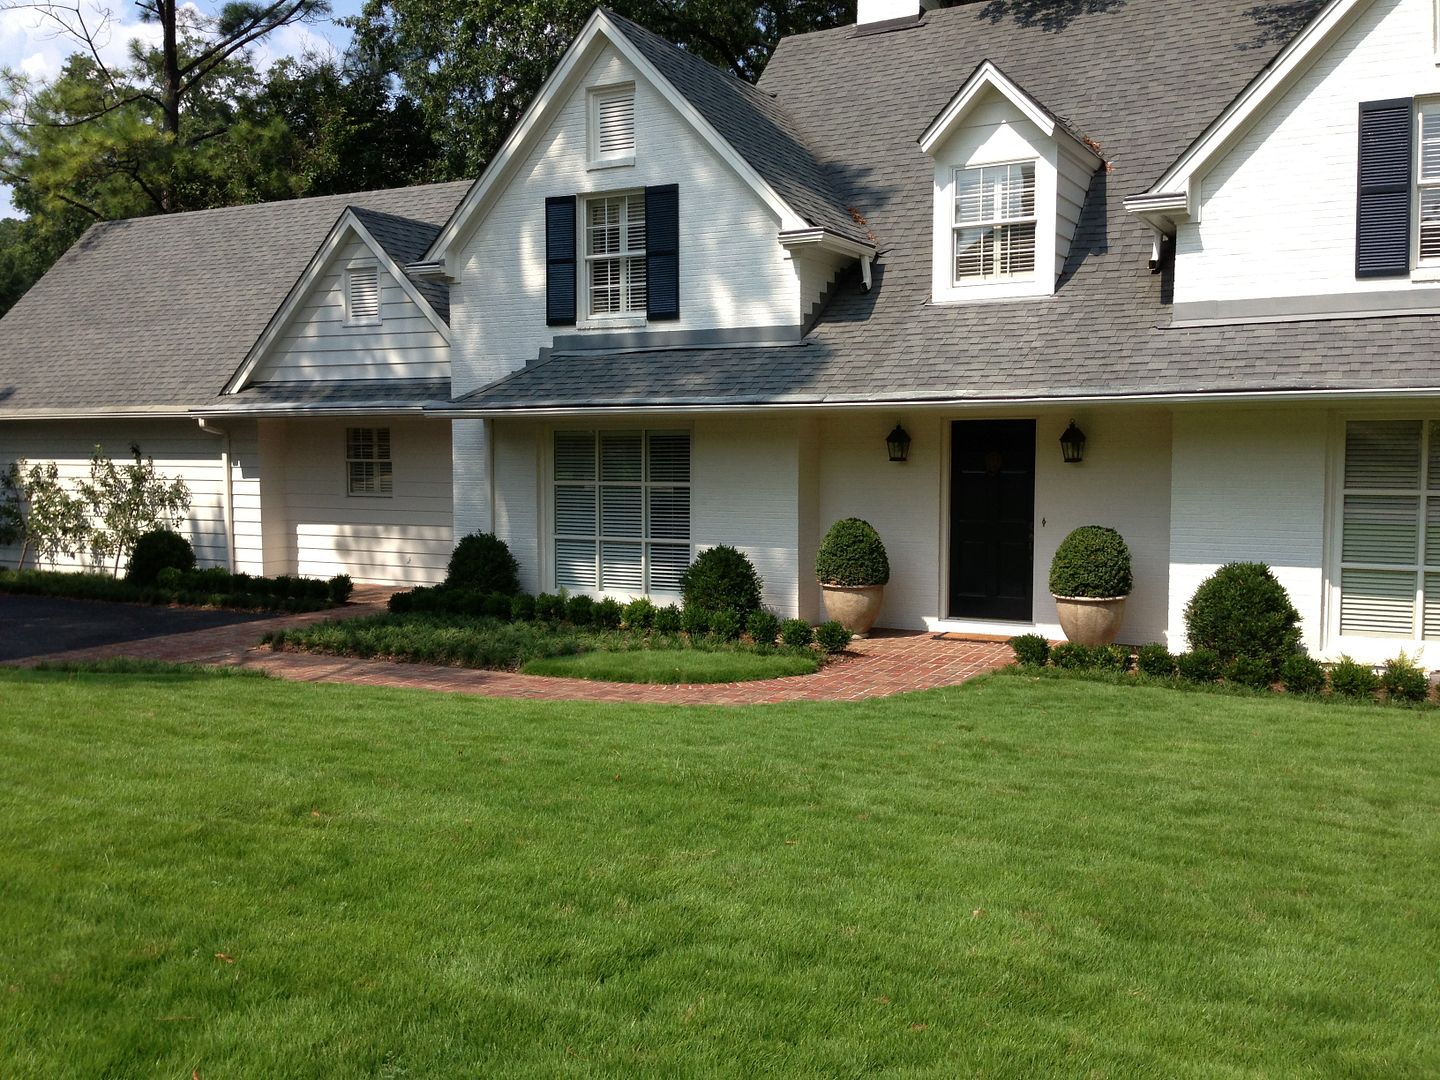
And here's where are we now . . .  the after. 

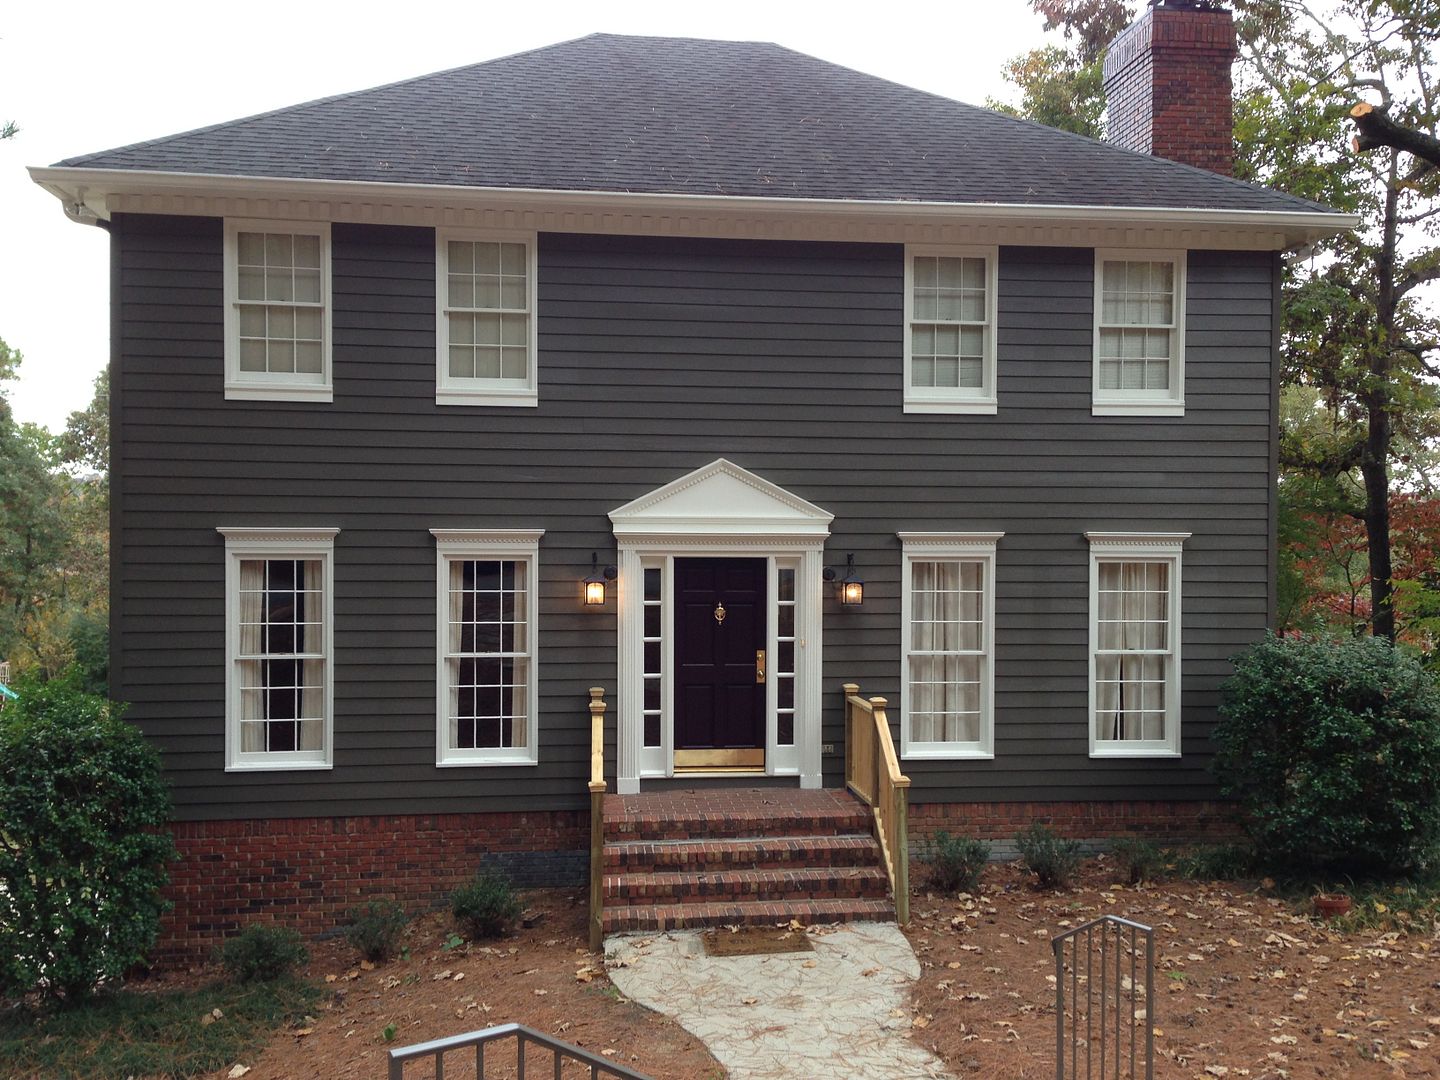
Since many traditional saltbox style homes do not include shutters, I recommended we edit these.  By removing the shutters, you actually see more of the base paint color giving the home a stately feel.  In addition to the removal of the shutters, I recommended adding some interest to the area above the front door.  Many saltbox homes have an additional window above the front door which adds interest.  Since we did not have this, adding a pediment over the doorway was really essential.  This not only draws your eye up to accent the height of the home, it also helps to provide depth to the facade of the home which was very flat.  One benefit I really did not appreciate when we created the plan was how the dark gray paint plays next to the brick foundation and chimney.  Just love how rich the brick looks now! 

There are still a few items on the list, but we are very close to completion.  The new railing which is more mission in style still needs to be painted the trim color.  Also, the plan is to add more trim work to the bottom of the upper windows to give them more weight and presence.  But just had to show you the progress!  Happy Wednesday. M.


Friday, September 13, 2013

Curb Appeal - an Update

It has been one busy week - I have been working on design plans, completed a really fun redesign with one fabulous gallery wall (I will be posting about it next week), and I've been making some changes at my own house (again, I will be posting about this too).  But, I wanted to give you an update on the curb appeal project I posted about back in May.  Here's the original post

When I last posted, we had completed the painting and clearing of the yard and were ready to install the landscape design plan for this home.  If you recall, my clients had enlisted the help of Randy McDaniel  for a plan to really play up the best features of this home.  

Well, here's the final result. . . . 

My clients are so happy with how it all turned out, and are especially thrilled to be finished and enjoying their new yard.   This is the side yard - since this home is on a corner lot, it was important for this side of the home to look great as well. 

They magnolia will add some privacy as they grow. 

I love the portion of the lawn thats dips into the bed on the left side of the house - really gives it a welcoming feel and breaks up the sidewalk.

This is one of my favorite things in the design plan - a pair of Espalier trees!  The perfect way to turn a large wall into a lovely focal point. 

Notice the extra large planters in the front - interesting shape and very lush with the addition of the boxwoods.

Happy weekend, everybody! M.


Monday, May 27, 2013

Curb Appeal - Before and Afters

Who doesn't love a good before and after? Am I right?!  And what better way to kick off Memorial Day than with a great example of the power of paint (and a little muscle).

Here's where the journey began.  My cute clients purchased this house about a year ago, and it looked like this . . . 

First, they enlisted the help of one of my all time favorite landscape architects here in Birmingham, Randy McDaniel.   His plans focus on highlighting the positives, downplaying the negatives and never allowing the landscape to upstage the house itself.  A very tall order!  Since this house sits on a corner lot (the other street is to your right in the photo), Randy worked hard to create primary and secondary focal points in his landscape design plan.  My clients are still working on installing the landscaping material; but here is a picture of the house following the clearing to ready the area for the new plantings.  

As an aside, my clients did a lot of the work themselves, but when it came time to cut the trees, they brought in the professionals.  The day before, they did this to the trees!  People driving by were stopping and looking in total confusion.

Then, for the paint.  Once we were really able to see the house, we got busy selecting paint colors.  It was clear it needed to be lightened up, but selecting an off white can be very daunting.  Too white and it feels stark and blinding.  Too warm and it comes off yellow.  A very fine line.  We narrowed the field to two Ben Moore colors for the body of the house.  In the end, here's the color we selected - China White.

 Then we selected a Farrow and Ball color for the front door.

If you notice, one of the issues this house had was two doors on the front of the house.  Here's a picture of it again for you to see.  People would have trouble deciding which door to go to when visiting the home.

The main door (to the right in the image above) opens into a gorgeous vaulted foyer, and the door to the left opens into the mudroom area with the kitchen beyond.  So, we decided to paint the secondary door the house body color so that it would disappear, giving the main front door all the focus.   I think it worked - paint is an amazing thing.

Also, notice we have removed the railings from the front entrance.  It looks so much bigger and more inviting with these removed.  The lighter paint in the alcove of the front door is also more welcoming.   The plan is to include some large planters on either side of the door, but patience!  All in due time!   I will post pictures once the front yard is complete.  You will not believe how pretty it's going to be once everything is installed.

Don't forget to hug a Veteran today!  Their sacrifices are the reason we enjoy the freedoms we do in this great country.     M.  

Thursday, February 16, 2012

Exteriors - Layering Tricks

As with interiors, the outside of your home needs layers to make it interesting and welcoming from the street.  Here are some things to think about to add some fabulous layering to the outside of your home.  
The front door is such and important focal point to your home.  Make the most of it with doors that compliment the style of your home.

  Can't figure out what style door will look best?  Start by evaluating the style of your home.  This is a great website to help you figure it out - House Styles Index


Think of your door hardware as the first opportunity to let your personal style and taste shine.  This is one of the easiest things to change and with huge results.


To shutter or not to shutter that is the question . . .
I love the looks of shutters.  I think they are such a pretty layer.

But this is gorgeous too!
source

source

Also known as "shutter dogs" these add a bit of jewelry to the shutters.  They also turn a so so shutter into something that looks expensive and important. 


There are so many materials to choose from with railings, an the styles are endless.


Not only is this an easy fix, it is one of the least expensive ways to update your curb appeal.  In fact they are so affordable, you can switch them out seasonally. 


I also love the look of vines softening the entryway of a home.

Now is the perfect time of year to sit down and really think about your curb appeal (with a hot cup of chocolate).  Make a plan using these simple ideas.  Once the weather warms up, you'll be ready to make the changes!  M.

Tuesday, January 3, 2012

DIY - Painting Shutters

For the past year, our shutters have needed attention.  I'm sure my neighbors were thinking, "We were wondering if you noticed!"  I definitely did - but, as we all know, life just seems to get in the way and the shutters never made it to the list.  Back in November I thought, it's now or never for this year.  So, we got busy.  
When we moved into this house, the shutters were stained, but in need of a refinish.  We hired a guy to do this for us.  It was expensive and took two weeks.  So, this time, I decided we just needed to paint them (the doors were still in great shape, so we just focused on the shutters).  
Since this was going to be a "quick" DIY job, I managed to talk my husband into helping me.  It was really not a difficult job.  In fact, Chris at Sherwin Williams in Homewood, gave me everything we needed and a lesson on how to do it.  

But, quick it was not.  We painted the entire weekend and still did not finish.  We took a break and finished up the following Saturday.  I know we saved some money, but my question is how valuable is your weekend time with your family?  I'm glad we did it, but not sure I would take it on again any time soon!  

For those who think it's worth your time, here's how we did it.

Step 1
Sand any loose chipping paint from the shutters and wipe them down with a clean damp cloth.
Step 2
Tape off the area to prepare for painting.  This step was crucial for us.  In fact, with the first swipe of my brush, it was all over the tape and I thought, "Wow . . . totally worth the extra time."
Step 3
Apply one coat of the proper primer (ask your paint specialist what you'll need).  Since our shutters were previously stained and varnished, we had to start with a primer that sealed them and allowed you to then go back over them with a latex paint.   
This stuff was as thick as fudge sauce and my arm was killing me when we finished.  But, an ibuprofen and glass of wine later, I was fine!
Step 4
Apply your paint color of choice.  Since the primer we had to use could not be tinted the same color as the paint, it took two coats to do the job.  

I really think we needed three, but realized the second Saturday that I would not be squeezing another coat out of the man, so I'm good with two!  Let's just pretend the pumpkins are not in the picture.  K? (After we finished this job, I got so busy with client projects that I did not have time to draft a post about it - thus the pumpkins in the picture.)  But you get the idea!  

I have a few DIY projects on the list for 2012 and will share them with you in the near future.  What about you?  What do you have on the list this year? M.